The kitchen is often called the heart of the home. It’s where meals are created, conversations happen, and memories are made. But when your kitchen drawers are cluttered and disorganised, that heart can quickly become a source of stress instead of joy.
From tangled utensils to Tupperware avalanches, many households struggle with kitchen drawers that seem to have a life of their own. The great news? With a clear strategy, some clever storage tools, and a little time, you can transform your kitchen drawers into spaces of order and efficiency.
This guide will take you step-by-step through the process of decluttering, organising, and maintaining your kitchen drawers so you can spend less time rummaging and more time enjoying your kitchen.

Why Drawer Organisation Matters
Drawer organisation may feel like a small detail, but it has a big impact on your daily life.
- Saves time: You’ll know exactly where to find your whisk, measuring spoons, or vegetable peeler.
- Reduces stress: Cooking becomes smoother when you don’t have to dig through clutter.
- Maximises space: Well-structured drawers often provide more usable storage than messy cupboards.
- Encourages healthier habits: When tools and ingredients are easy to access, you’re more motivated to cook at home instead of relying on takeaway.
- Promotes cleanliness: Neat drawers are easier to wipe down, which keeps your kitchen fresher overall.
👉 Think of your drawers as your kitchen toolkit, when they’re set up properly, the whole system runs better.
Step 1: Empty and Declutter Every Drawer
Decluttering is always the first step in any organising project. Start fresh by emptying every kitchen drawer. This gives you a blank canvas to work with and helps you see exactly what you own.
- Group like items together: Gather all your utensils, gadgets, baking tools, and cutlery into piles.
- Be realistic about duplicates: Do you really need 6 spatulas or 3 can openers? Keep the ones you actually use.
- Toss broken or worn items: That rusted whisk or cracked measuring jug isn’t serving you.
- Be honest with yourself: If you haven’t used a garlic press, melon baller, or avocado slicer in years, it’s not worth the drawer space.
💡 Pro Tip: Use a “Maybe Box” for items you’re hesitant about. Store it out of sight for a month. If you don’t miss them, let them go.
Step 2: Assign Drawers by Function
Once you’ve decluttered, it’s time to create zones of efficiency. Assign each drawer a clear purpose, based on your cooking routine.
- Cutlery drawer: Near the dishwasher or dining area for quick access.
- Cooking utensils drawer: Spatulas, spoons, tongs, and ladles near the stovetop.
- Prep tools drawer: Knives, peelers, graters, and scissors close to your chopping station.
- Baking drawer: Measuring cups, rolling pins, cookie cutters near the oven.
- Tupperware drawer: Lids and containers in one designated place.
- Junk drawer (optional): If you must have one, keep it small and use dividers to contain chaos.
💡 Pro Tip: Think of your kitchen like a restaurant, chefs organise their “stations” so everything is within reach. Apply the same principle at home.
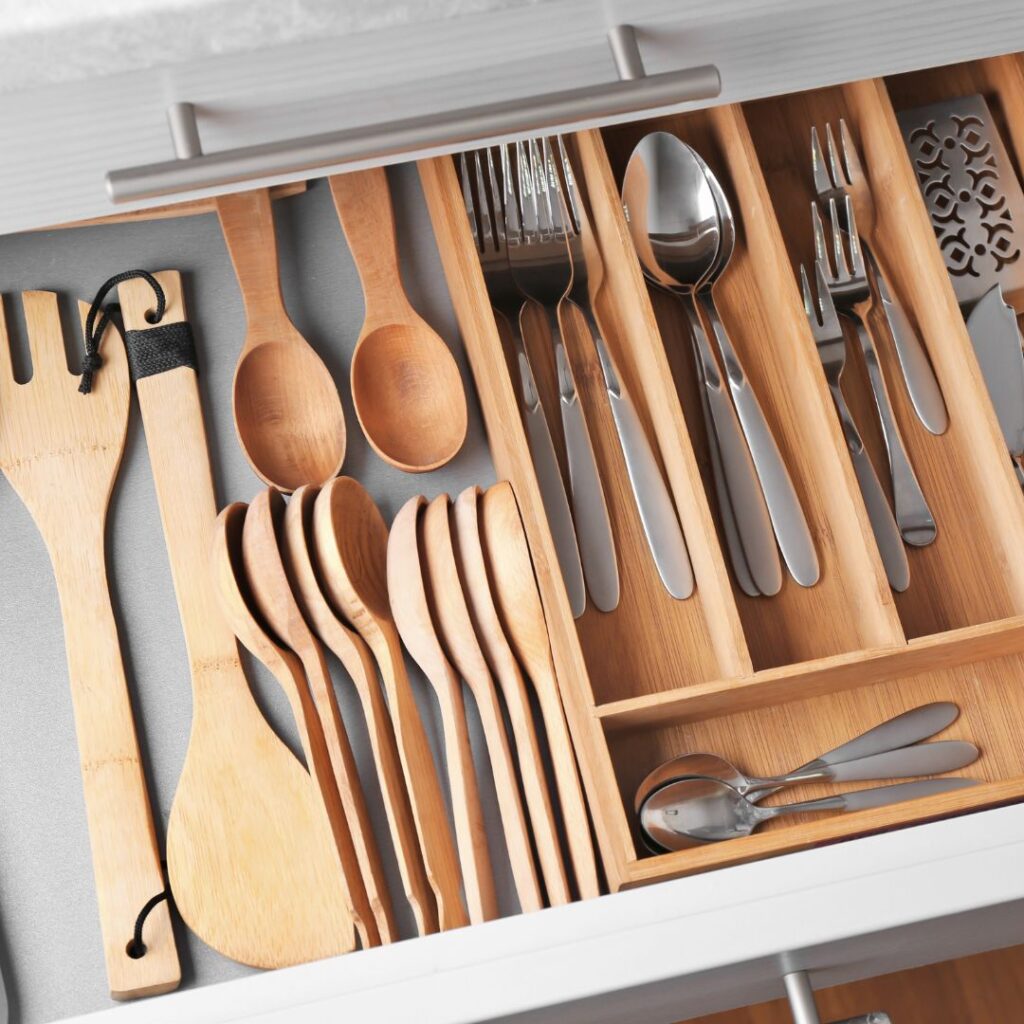
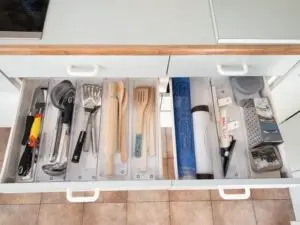
Step 3: Use Drawer Dividers and Inserts
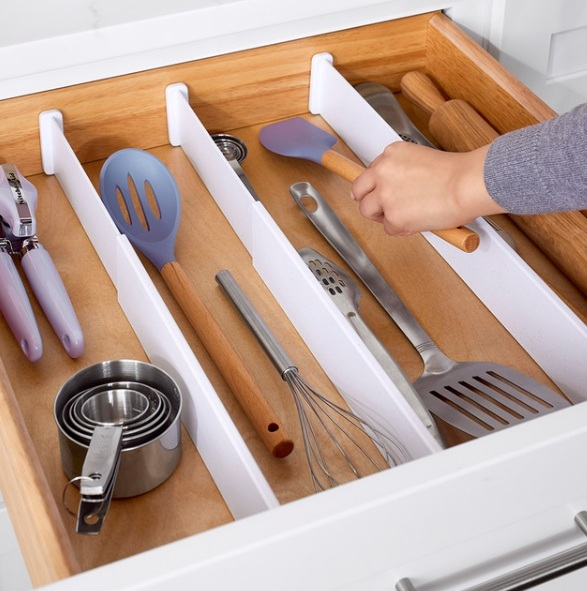
Image source: Howards Storage World
Dividers are the secret weapon of organised drawers. They turn a messy jumble into a structured, easy-to-maintain system.
- Cutlery trays keep forks, spoons, and knives separated.
- Expandable dividers adjust to fit any drawer size.
- Utensil organisers keep spatulas and whisks from tangling together.
- Knife inserts safely store knives in drawers, freeing up counter space.
💡 Pro Tip: Choose materials that suit your style, clear acrylic for a modern look, bamboo for warmth and durability.
Step 4: Maximise Vertical Space
Image source: IKEA
Drawers aren’t just for flat storage. Deep drawers can hold much more when you use vertical systems.
- Use peg systems to stack bowls and plates neatly.
- Install a lid organiser to stand pot lids upright.
- Store baking trays or cutting boards vertically in a deep drawer.
- Try vertical knife blocks inside drawers for safe, space-saving storage.
💡 Pro Tip: Reserve deep drawers for bulky items like mixing bowls, food processors, or large pots.
Step 5: Contain Small Items
Loose, tiny items are notorious for disappearing in large drawers. Keep them under control with small containers or bins.
- Use mini bins for spice packets, tea bags, or medicine.
- Store baking tools like piping tips in labelled trays.
- Repurpose household items, ice cube trays, small jars, or old gift boxes, for small kitchen gadgets.
💡 Pro Tip: Label every container, even the small ones. It saves confusion and helps the whole household stay consistent.
Step 6: Prioritise Everyday Items
Efficiency comes from having what you use most often at your fingertips. Organise your drawers by frequency of use:
- Top drawers – Cutlery, spatulas, knives.
- Middle drawers – Tupperware, measuring tools, mixing bowls.
- Bottom drawers – Small appliances or rarely used items.
💡 Pro Tip: Think “grab-and-go.” If you use it daily, it should be front and centre.
Step 7: Tame the Tupperware
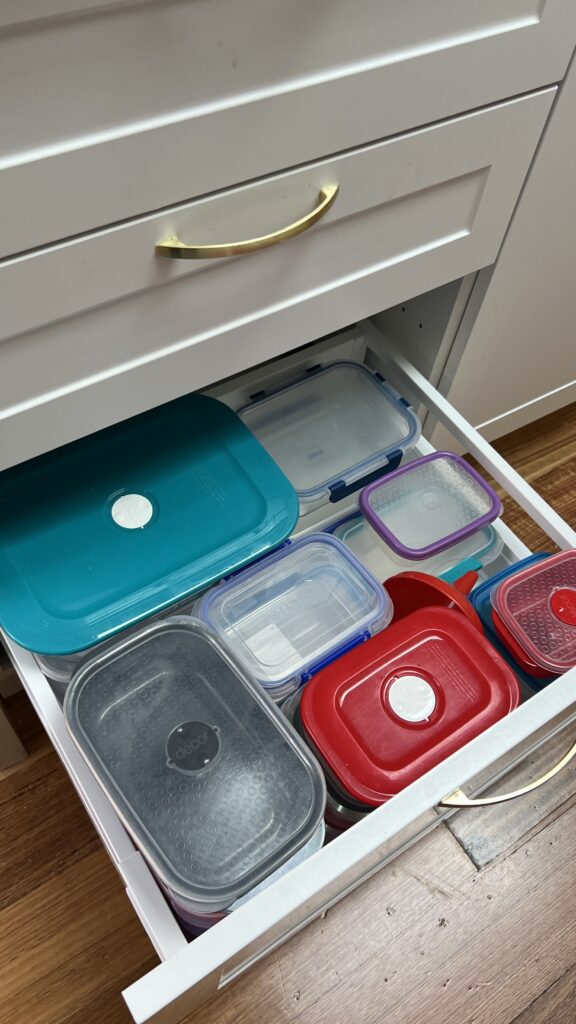
Tupperware chaos is a universal struggle. Here’s how to bring order:
- Nest containers inside each other by size.
- Keep lids separate using a rack, tray, or even a dish drying rack inside the drawer.
- Purge mismatched sets, if the lid or base is missing, let it go.
- Stick to one brand or style of container to make stacking easier.
💡 Pro Tip: Dedicate one drawer exclusively to Tupperware to prevent it from spreading into other spaces.
Step 8: Label for Long-Term Success
Labels are a simple yet powerful tool for maintaining order.
- Label utensil compartments (e.g. “Spatulas,” “Tongs”).
- Label small bins (e.g. “Baking Tools,” “Tea,” “Snacks”).
- For families with kids, consider picture labels for easy clean-up.
💡 Pro Tip: Use removable labels if you like to change systems seasonally.
Step 9: Maintain with Quick Resets
Organisation isn’t a one-time job, it’s a habit. Create simple routines to keep your drawers neat:
- Daily: Do a quick 2-minute check while cleaning up after dinner.
- Weekly: Wipe crumbs, reset items that have wandered, recheck crowded drawers.
- Seasonally: Rotate or remove tools for seasonal cooking (e.g., baking trays after Christmas).
💡 Pro Tip: Set a “drawer reset” reminder in your phone once a week.
Step 10: Call in Professional Help

Sometimes, drawer chaos feels overwhelming, and that’s okay. A professional organiser can make the process faster, easier, and less stressful.
They bring:
- Clarity: Breaking the project into clear, manageable steps.
- Efficiency: Helping you get results in hours, not weeks.
- Custom systems: Tailoring solutions to your kitchen and habits.
- Relief: Taking the mental load off your shoulders.
💡 Pro Tip: If you’re short on time or motivation, professional help can be the difference between chaos and calm.
Organising your kitchen drawers isn’t just about tidiness, it’s about creating a system that makes your life easier every single day. With decluttering, smart zoning, dividers, labels, and maintenance routines, you’ll transform your kitchen into a space where cooking feels joyful instead of stressful.
Remember: progress doesn’t happen overnight. Start with one drawer at a time and build from there. Soon, your entire kitchen will feel more functional, efficient, and calming.
👉 Ready for stress-free kitchen drawers (and a calmer home overall)? Book your free consultation with Ducks in a Row Home Organisation and let us create a customised organising system that works beautifully for you and your family.